Artificial turf is one of the easiest ways to enjoy a clean, low-maintenance lawn that stays green year-round. But the finish only looks truly professional when the installation is done with care.
Every step, from removing old soil to compacting the base and aligning seams, shapes how the turf performs over time. Installing artificial grass may seem simple, but precision is what prevents wrinkles, drainage issues, and uneven spots.
Interestingly, the smartest prep work mirrors how one would handle ants in a kitchen: clean thoroughly, eliminate anything that attracts trouble, and seal gaps before adding anything new. The same approach creates a stable, weed-resistant foundation that keeps the turf secure and long-lasting. A well-prepared base doesn’t just improve appearance, it protects the lawn for years to come.
Why Proper Installation Matters
Good turf is never just about the grass you buy; it’s the work underneath that decides how natural and durable it feels. When the base is prepared properly, the lawn stays smooth, stable, and realistic year after year. Careful installation prevents the common problems homeowners often face, from sagging spots to wrinkles and poor drainage.
- Wrinkling or rippling
- Poor drainage
- Weeds pushing through
- Edges lifting
- Footprint depressions
Professionals treat prep as the most important phase, much like cleaning and sealing surfaces before addressing an ant problem. The groundwork always determines the outcome.
What to Consider Before Starting
Ground Condition
The soil must be checked for unevenness, soft spots, rocks, or areas where weeds commonly break through. Just as sealing entry points stops ants, sealing ground gaps prevents weeds from working their way into the turf later.
Drainage
Artificial grass drains through the backing. Without the right base, water collects underneath. Sloping the ground slightly improves how water moves through the subsurface.
Traffic Level
High-use spaces see a lot of movement from kids, pets, or sports activities. These areas put extra pressure on the turf, so the material needs to be tougher. A denser turf paired with stronger infill keeps the lawn looking smooth and durable.
Accurate Measurements
Measuring the area accurately makes the entire installation smoother. It prevents awkward gaps or overlaps and keeps seams to a minimum. When the turf rolls line up cleanly, the lawn looks far more natural and professionally done.
Materials and Tools Needed
- Artificial turf
- Weed barrier
- Shovels and rakes
- Utility knife
- Class II road base or crushed granite
- Optional sharp sand
- Plate compactor or tamper
- Seam tape and adhesive
- Landscaping nails or U-pins
- Infill
- Stiff broom
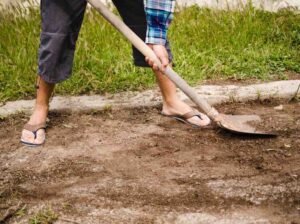
Step 1: Clear the Area and Remove Existing Grass
All natural grass, weeds, and debris need to be removed. Installers typically dig down about 2–3 inches to eliminate the organic layer. This is similar to removing food and moisture sources when dealing with ants; anything that attracts biological activity must go before installation. A clean surface prevents soil decay, odors, and hidden pest activity later.
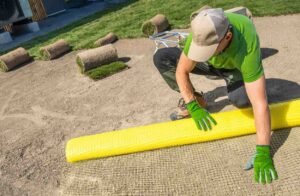
Step 2: Level the Ground and Improve Drainage
Rake the soil smooth and remove rocks or lumps. If the yard has dips or holds water, create a gentle slope (around 1–2%). Any visible gaps or broken soil pockets are filled or compacted. As with sealing ant entry points, suppressing weak or open areas stops weeds or pests from pushing upward under the turf. A weed barrier is placed at this stage to block future growth.
Step 3: Build the Base Layer
 Add Base Material
Most installers go with Class II road base or crushed granite because both create a strong, stable foundation. These materials compact smoothly and prevent the turf from sinking or shifting. The result is a firm, even surface that holds its shape over time.
Spread and Compact
The base is spread about 2–3 inches deep and leveled evenly across the ground. Once it’s in place, it’s packed down firmly with a plate compactor to lock everything together. This step matters more than it seems. Proper compaction keeps the lawn from sinking, shifting, or developing soft, uneven spots later.
Step 4: Add an Optional Sand Layer
A thin layer of sharp sand helps achieve a perfectly level final surface. This layer is screeded flat and lightly compacted. Not every yard needs this, but it’s helpful on uneven or sloped ground.
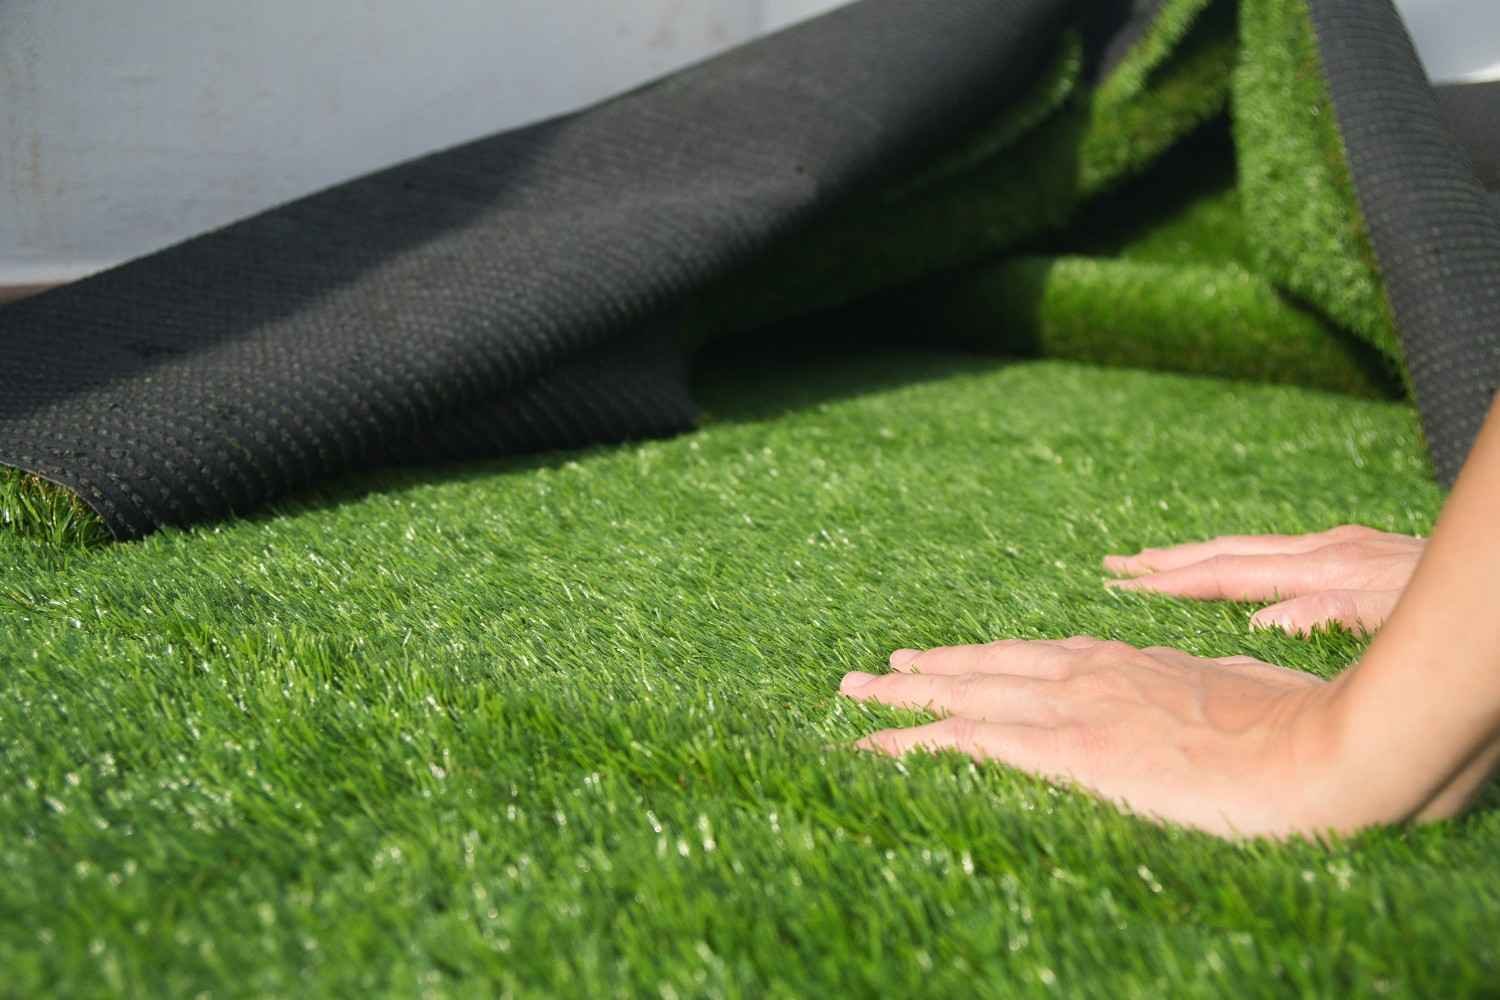
Step 5: Lay Out the Artificial Grass
Roll out the turf and allow it to sit in the sun for an hour or two. Warm turf relaxes naturally and becomes easier to shape. All yard sections must run in the same direction to avoid mismatched shading.
Step 6: Trim and Shape the Turf
Using a sharp utility knife, trim the edges and shape the turf around borders, patios, and curves. Clean, intentional cuts allow the turf to sit flush with the landscape.
Step 7: Join the Seams
If the lawn requires multiple rolls of turf, joining seams correctly is essential.
Process:
- Fold the turf edges back.
- Place seam tape beneath the meeting points.
- Apply adhesive evenly.
- Press and align both turf pieces.
- Ensure the blades lean in the same direction.
Good seams make the lawn look natural and continuous.
Step 8: Secure the Turf Edges
Landscaping nails or U-pins are driven around the perimeter every 6–8 inches and throughout the interior every 12–18 inches. This keeps the turf anchored against movement and wind.
Step 9: Spread the Infill
Infill supports turf blades and improves resilience. Common choices include:
- Silica sand
- Pet-friendly antimicrobial infill
- Rubber crumb for sports areas
The infill is spread evenly with a broadcast spreader and brushed in with a stiff broom.
Step 10: Brush and Finish the Lawn
 Brush the turf against the grain to lift the fibers and give it a natural appearance. Inspect seams and edges one more time and add more infill if the grass looks flat.
Comparison Table: Best Base Materials for Artificial Grass
| Base Material | Ideal Use | Benefits | Considerations |
| Class II Road Base | Standard residential lawns | Excellent drainage, strong compaction | Requires a plate compactor |
| Crushed Granite | High-traffic or pet areas | Extremely stable and durable | Higher cost |
| Sharp Sand (Top Layer Only) | Finishing and leveling | Smooths the surface for turf placement | Not suitable as the only base |
| Decomposed Granite | Dry regions | Firm texture, drains well | Needs precise leveling |
How Long Does Installation Take?
Most standard lawns take:
- 1 day for small spaces
- 2–3 days for medium to large yards
- Longer when heavy grading or drainage correction is needed
Maintaining Artificial Grass After Installation
 Artificial turf maintenance is simple:
- Brush periodically to keep fibers upright
- Rinse dust or dirt as needed
- Use enzyme cleaners for pet areas
- Replenish infill over time
Even though artificial turf doesn’t attract pests the way natural lawns do, the preparation steps, cleaning thoroughly, and sealing the soil, help prevent hidden pest activity beneath the lawn.
Frequently Asked Questions
1. Can artificial grass be installed directly on soil?
Direct soil installation leads to sinking and unevenness. A compacted base is required for stable, long-lasting turf.
2. How thick should the base layer be?
Most yards need 2–3 inches of compacted base. High-traffic areas benefit from 3–4 inches.
3. Is artificial grass good for pets?
Yes. Pet-friendly turf paired with antimicrobial infill controls odor and makes cleanup easy.
4. How long does artificial grass last?
With proper installation and occasional maintenance, artificial grass typically lasts 15–20 years.
Final Thoughts
Installing artificial grass is a detailed but manageable project. The key is thoughtful preparation, clearing the ground thoroughly, leveling and sealing gaps, and building a compacted base that stays firm for years.
It’s the same principle used when removing ants from a kitchen: clean the space, eliminate weak points, and create a stable surface before adding anything new.
Homeowners who follow these steps create a turf system that looks natural, drains well, and stands up to daily use without fading or flattening.